Sunday, March 20, 2011

Scrapbook Room Reorganization...IN PROGRESS


So i haven posted much lately for two reasons...1 i couldn't find anything in my room because it was a nightmare of stuff. My family apparently thinks if they can't find where it goes we just put it in my scrapbook room. 2 I didn't have a computer. I've remedied the 2nd problem and am in process for the other. Here's a few pictures of the process with some before and in process shots. Once it's done (if it ever gets 'done') Ill post more pictures!!!!

Saturday, March 19, 2011

Cakes Anyone?


I am beginning to dabble in cakes a bit. Discover fondant the other day and LOVE it!!! I used a marshmallow recipe I found online and I love it. Half a bag of mini marshmallows, 2T Water microwave for 1 minute. Stir in powdered sugar until it wont stir anymore. Awesome!!! Here is a couple cakes I did. Im still learning but one is the Super Mario Mushroom on the mystery box and the other is my weak attempt at the grinch!

Monday, February 21, 2011

Springtime Cards using FREE paper!!!!


Even as a Independent Demonstrator I am taking full advantage of the SALE-A-BRATION! I bought the Easter Blossoms stamp set from the new Occasions Mini along with the 2 3/8 Scallop Punch and I got the Ice Cream Parlor paper kit Free. I LOVE this time of year. I also used the top coat which is pretty cool. It doesn't show in the picture as well but there is a shimmer on the little girl and her basket of eggs. Lots of fun! If you don't have you Occasions Mini or your SALE-A-BRATION Catalina there is still time to order. Email me for your free catalog! I'll keep mastering my photo taking for a better picture.

Sunday, February 13, 2011

Valentine's Sour Cream Containers

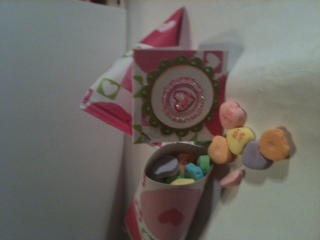
I used Me & My Big Ideas Valentine paper. Cut 5" x4", use double sided adhesive down the 4" side and roll. Put a 2 1/2" strip of double sided adhesive on one end of the tube and seal. Run it through the crimper about 2 clicks. Fill with your treat and repeat the 2 1/2" strip of adhesive on the other end. Run through the crimper 2 clicks making sure not to get your treat caught! The mini cards are made from the 2" strips left of the 12x12 paper. We made 30 containers. The front of the mini card are made with the 1 3/4" scallop circle and 1 3/8 circle punches from Stampin' Up. My 8 year old had a blast making them. See what happens when I clean my scrapbook room?!?! heres a link for the photos I'm having some technical difficulties. It will also pass by on my creative slideshow at the bottom of my blog.

Daily Crafting Challenges Anyone?!?!?!

Now that I'm feeling better I am going to spend more time doing what I love... Crafting. I think the best way to truly do this is to do something everyday. They say if you do something everyday for 30 days you create a habit. So I am changing my obsession to a well-developed habit. My first challenge is to make my room user friendly. It has become the dumping ground for everything my husband doesn't want to find the real home for. This epidemic begins today...well when I wake up at a normal hour not 2:45 in the morning. So today's official challenge is to pick everything up in my room and find it's home so I can put my wonderful creativity to work...Good Luck!!! Tell me what did you do today?

Thursday, February 3, 2011

Girl Scout Peace


We always make t-shirts for every event we do with my girl scout troop. I used Sure-Cuts-A-Lot and my Cricut Expression to make the peace sign and the troop sign. I used clear shelf paper to cut out of because its a lot cheaper than vinyl. I used the spray cannon to spray the shirts with pink and neon green. When I removed the stencil the peace sign didnt pop enough. I used fabric markers to outline the stencils. I did 10 shirts in about an hour.

Thursday, January 13, 2011

Lot's Of New Stuff

So many new promotions so little time!!! Check out all the goodies!!! Book a party during Sale-A-Bration and get extra free stuff!

Friday, December 24, 2010

Monogram Letter


This was for a friend. She bought the HUGE letter at Joann's. I used glitter paper, waxy twine, bottle caps, stickers and miscellaneous clips. I used Stampin Up Flowers and brads to add more 3-D effect. It's just randomly placed all over, perfect for a 10 year-old's room. I used a lot of decoupage and hot glue to keep it all together.

Monday, December 20, 2010

More Blocks!!!

Its really hard to take the picture with the lights on but you get the idea! Super cute though I am about to do the night lights :)

Saturday, December 18, 2010

December Hostess Sneak Peak!


Decided to stick with Christmas even though it's kinda close! I used the polished stone technique for the card. Its shiny even though you cant see it in the picture. I decided since the technique was a bit easy that I would use up some scrap paper and do some tags! I used the Contemporary Christmas and Cute Christmas from Stampin' Up. Hope the girls like it!!!

Wednesday, December 15, 2010

Glass Blocks


These are so much fun! Lots of Vinyl and a combo of Sure Cuts A Lot and Cricut Cartridges. Just had to share!


Vinyl Ornaments

These are for my daughters school. The falcon is their mascot. I used Sure Cuts A Lot to do the mascot and the letters. It was super easy!

Teacher Project EASY!

Another one of the teachers gifts for the 'Ha Ha Holidays' . I just cut presents out of Christmas Cardstock. The present is Cricut Joys of the Season. I attached 2 'aa' batteries to the back with tape. The project was for 100 faculty memebers. We did projects for 13 days for less than $150. Of course Michaels coupons and sales were involved :) Happy Crafting!!

Tuesday, December 14, 2010

Silhouette Thank You Card

I whipped these up quick for my daughters softball team parents (my husband is the head coach) to thank them for a great season. Simple card with patterened paper backing a Stampin Up Pretty in Pink paper that I ran through the Cuttlebug embossing folder (I ran 2 at a time to speed up the process). I distressed the embossed paper and adhered them all together. I used scrap paper in Pretty in Pink and Black and the punches Scallop Oval Extra Large and Large Oval from Stampin Up for the Thank You at the bottom. The silhouette is cut with the Cricut Cartridge A Child's Year. I had made bows for the girls over the season and used the leftover ribbon to cut little 1" piece and attach 4 different ribbons with a black brad.

Friday, December 3, 2010

Embossed Glass Ornament.


Glass Ornaments for the softball team. The pink jersey is embossed with pink embossing powder. I cut the shape and number on the Cricut. After placing the stencil on I used the Versa Mark to cover the inside of the stencil. I outlined the jersey and the number with an acrylic marker. I stamped the baseballs with Stampin up White Craft Ink. I sealed it with acrylic sealer.


Thursday, December 2, 2010

Reindeer Kisses

We are doing "Ha Ha Holidays" for our Faculty at my daughter's school and one idea I had was Reindeer Kisses. You gotta love the Cricut and the fact it can cut out 100 reindeer in no time. Add some googly eyes and a hershy's kiss you viola! Reindeer Kisses XOXOXOXO


Wednesday, December 1, 2010

Creation on the go!!!

I absolutely love these block projects we did at the last Stampin' up Hostess Group. They are so much fun to make. I wanted to give my in-laws a thank you for hosting us this past week but I was on the opposite site of the country. I did this block on the go with glitter foam balls inside instead of lights. The saying is out of vinyl and there are a bunch of epoxy snowflakes on the inside and outside that dont show the best in this picture. I have so many more ideas!!!

Sunday, November 21, 2010

Stained Glass Card

This is the Stained Glass Technique. It was pretty cool and dried a lot faster than I thought. I used the Top Note Sizzix Die from Stampin Up, Cherry Cobbler Paper, Clear Window Sheets from Stampin UpOld Olive Ribbon, Whisper White paper, Snowglobe Stamp from Stampin Up, and the have a cute Christmas stamp from another Stampin Up Set, Crystal Effects, and ReInkers Bashful Blue, Old Olive, Cherry Cobbler, and some Used So Saffron. We stamped the image was stamped with the Black StazOn on the window sheet and let dry for a couple minutes. Flipped the sheet over for the stained glass. We mixed 2 drops crystal effects with 1 drop of the reinker color we wanted. After coloring it in we set it aside to let it dry. We folded the Cherry Cobbler paper and ran it through the sizzix with the top note die. The white is stamped with snowflakes and the sentiment so you can see it through the window. The white is a card that opens to the right instead of a standard card fold. The two are glued together so when opened make a triangle. This way you can still write on the inside and not see it through the window.

I actually HAVE been busy!!!


Ok these are the glass blocks you can get at the craft store with a hole drilled in the bottom of them I bought my blocks with from Home Depot and had my sweet husband drill holes in them for my class. It was hard to get a picture of the bow and block because when the block is lit the flash won't work (im still working on the photo techniques :) We used Stampin' Up Jolly Holidays and StazOn Black ink for the design. The backround is done with Jesso found in the acrylic paint aisle since it dries pretty fast. We sponged on the white to give it the snow effect and then stamped when it was dry. We used the regular Stampin Up ink pads to color in the images. I used a since night light that is used at Christmas for the little houses to light up the block. Many of the club members used a small string of Christmas lights and fed them into the hole. We used thick wire ribbon to tie the top. I am thinking about some great teachers gifts!!!