Wednesday, December 28, 2011

Baby Shower Invitations


I made these for a very good friend of mine who LOVES turtles and is having a little boy. The patterned paper is an old Stampin Up set that worked perfect for the colors I wanted and I accented with Old Olive and Bashful Blue for Mr. Turtle. I used my trusty Cricut, Gypsy, and th Life is a Beach cartridge for the turtle. Of course no cute turtle is complete without googly eyes :) The party will be decorated similar so come back for the decor!!!

Tuesday, December 20, 2011

Twelve Days of Christmas Day 12 1/2


Ok I had two issues with this post and both were completely a ditzy moment on my behalf... 1) I have no clue which teacher gift I forgot in my 12 Days of Christmas but whatever it was I didn't take a picture of it and 2) I don't follow recipes so when something turns out great I have no idea what I did or can I tell someone how I do it. This drives my family CRAZY!!! BUT I will try to tell you HOW I made the puppy chow even though you can probably find a recipe somewhere. I got irritated the first time I made this by the recipe I found online because I had about 2 cups of Chex cereal left over and it seemed like such a waste. SO I made 1 large box of cereal, by melting 1 stick of butter, 3/4 C peanut butter, and 1 bag of semi-sweet chocolate chips plus about a 1/2 cup of chocolate chips. I melted this in the microwave for about 2 1/2 minutes on cook power 5 and stirring about ever 30 seconds. I dumped the cereal in a paper grocery bag and poured the melted mixture over it. I shook the bag well until all the cereal was covered. I then dumped about 2 cups of powdered sugar and repeated the shaking process. I then dumped it out on wax paper or foil to 'cool' or dry. I bagged it up with some Christmas ribbon. I got about 12 bags out of it.

Friday, December 16, 2011

Twelve Days of Christmas Day Eleven


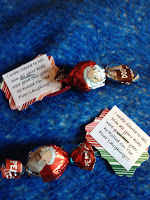
I saw these round truffle chocolates when I was shopping for my 12 Days of Christmas and I couldn't resist the little Santas. I got my inspiration from the cartoon that said Sanat got your letter you've been good this year and he died laughing. I DIDN"T think that was appropriate for an elementary school so I modified it to :

I wrote Santa to tell him all your kids were good this year, he Rolled On The Floor Laughing!

Merry Christmas!

Thursday, December 15, 2011

Twelve days of Christmas Day Ten


This one took me awhile because I kept coming up with "Just Keep Swimming" but I couldn't come up with how to relate it to Christmas or the teachers. So I went to It's o-FISH-ally almost Christmas Break! Kinda corny but the little red fish make me smile.

Wednesday, December 14, 2011

Twelve Days of Christmas Day Nine


I try not to repeat any ideas but I couldn't resist anything with the Grinch this year. The original poem I found called for green candy canes. I couldn't find 100 green candy canes without spending a small fortune. I did find candy canes with a green stripe so I added my own twist to the poem.


When the Grinch discovered,
There was no way,
To keep Christmas from Coming,
On Christmas Day,
He devised a new plan...
Though not quite as mean,
He licked all the teacher candy canes,
And turned them part
GREEN!

Tuesday, December 13, 2011

Playing With Vinyl Again


This was a special request from a very special girl and I can't resist a new challenge. Especially when it comes to using my Sure-Cuts-A-Lots & Cricut. Even though I am NOT a Hawkeye Fan since I paid for my education at ISU, I helped with the project anyway. Im pretty impressed with how they turned out especially since I was using Wii Rockband sticks to make it.

Twelve Days of Christmas Day Eight


Another funny one I found online. Had to improvise a little since my budget was tight. I used the Stampin Up Pillowbox die to cut the puzzle boxes. I have a good friend who hooked me up with the shavings of wood for my puzzle 'pieces'. The 100 puzzles had the same concept just different packaging. The label says "Expert Jigsaw Puzzle"

Monday, December 5, 2011

Twelve Days of Christmas Day Seven


I had a great elf helper with this one to make the cake pops with no stick :). The chocolate pools to look like it is melting. It is tied with 3 tags, a snowflake made with Stampin Up's new three-in-one punch to look like a snowflake from glitter paper, a tag punched with the Stampin Up Curley Label Punch that says "Florida Snowball", and the third that was cut in a square that says "Caution throwing this snowball may cause a food fight". Happy Crafting!

Wednesday, November 30, 2011

Twelve Days Of Christmas Day Six


I bought the 100 ct box of candy canes, made the labels on standard address labels to day "CANDY CANE PUZZLE", and used my leftover paper scraps and the Stampin Up Ornament punch to punch 2 ornaments per candy cane. I used the labels to attach the paper ornaments. The most fun part was breaking the 100 candy canes! I tried to get them in larger pieces so that they could still eat them. I did $100 for about $4.

Tuesday, November 29, 2011

Twelve Days of Christmas Day Five


I found a great deal on the Pop Tart Crisps at the store so I needed to incorporate them into my holiday. Remember I am doing these gifts for my daughters PFA for 100 faculty members, 12 days, on a budget of $150. The red card stock was creased at 1" on the long side then cut in equal 3.6" strips on the short side. This gives you 3 3.6"x8.5" projects per 8 1/2 x 11 card stock. I staples the small bags in the fold side which is the matchbook side. Once it is stapled you can bend the long side so it catches inside the matchbook lip. I then cut the poems 2.5"x3.25", and the Christmas Paper mat 3x3.5. I stapled that on the fold side so that the matchbook would close nicely. The poem is:

Welcome to your PFA’s Ha Ha Holidays!

Our goal is to make your 12 Days before Christmas,

POP with excitement,

Keep you sweet not TART,

Leave a fun memory CRISP in your mind.

ENJOY!!!

Monday, November 28, 2011

Twelve Days of Christmas Day Four


Holiday Survival Kit was found online and tweaked for the teachers a bit. I simply used a brown bag, Curling Ribbon, green card stock. The poem is:

Happy 12 Days Of Christmas!


Holiday Survival Kit

A stick of GUM to remind you to stick to it.
Christmas Break will be here soon.
A hershey kiss to remind you that you are loved.
Even when your students are bad.
A Tootsie Roll to remind you to roll with each day,
Even if your students have other plans.
A pin to remind you to stay sharp,
Or the students will take over!
A Smartie to help remind you that all kids are smart,
Even though they are ready for break too
A Starbrite remember, you are your students bright star,
Even if all they talk about is SANTA!

Happy 12 Days Of Christmas

Wednesday, November 23, 2011

12 Days of Christmas Day Three


I got the poem from some other wonderful crafter online. I used some green Christmas paper and used the Top Note Die from Stampin Up. The baggie is a bit small but since Im making 100 items everyday on a $150 for twelve days so we went economical. Happy Thanksgiving!!

Here's the poem:


The Grinch has been here!
He left just one clue...
This little green pile,
Of Grinchy "Pooh".

But why did he do it?
Did he want to get caught?

As the Grinch would say,
"I most certainly did not!"
But Santa and the reindeer
(with nose set on dim),

Landed on the roof,
And scared IT out of him!
He left in a hurry -
Homeward bound,

Leaving little green piles

All over the ground.

Tuesday, November 22, 2011

12 Days of Christmas Day Two


Another fun one that is super easy. I couldn't find just the red M&M's so I actually divided bags and will be using the green later. The tubes are from Stampin Up, along with the paper tabs. The red pieces of paper are 1 1/2 x 4 1/4 folded in half. I stapled them on the bags and then put the ornament punch overtop. The reindeer stamp is from Walmart $1 bin because i needed something cute and a little funny. I added the ribbon to add some bling to the tab. Only 98 more to make :)

Monday, November 21, 2011

Teacher's 12 Days Of Christmas


The PFA at my daughter's school started a tradition the last 12 days before school lets out before Christmas Break we put a little something in their mailboxes to make the last couple weeks fun. It started as the 12 days of Christmas and have moved onto the 'Ha Ha Holidays" Each day its something different and we usually do 100 faculty for 12 days for about $150. Which is VERY challenging even though I am as FRUGAL as they come :) Here's the first one I did. I go the 10 pack of chocolate coal at Big Lots for $1 and it is wrapped in a little square of red tissue paper with a twine tie. The poem is:
I heard you have been naughty not nice,

And Santa even checked his list twice.
He noticed too much work and no play,
A lot of patience for little pay.

So all the way from the North Pole,

all you're getting is a lump of coal.

Sunday, August 28, 2011


We made this using the pillow box Sizzix die from Stampin' Up, Elegant Lines Embossing Folder from Stampin' Up, Beatiful Butterflies Bigz Die, and Wild Wasabi grosgrain ribbon also from Stampin' Up.  We also used scrap pieces of Melon Mambo patterned paper & Melon Mambo Cardstock from Stampin' Up.  More to come!!!

Hostess Club

We had a lot of great projects today...can't wait to get them posted!

Sent from Nikki's iPad

Sunday, July 3, 2011

Vinyl Banner Made with Cricut and Gypsy!!!


I made this banner from scratch using the Sports Mania Cricut Cartridge, My Gypsy, and my Expression. The only thing I used Sure-Cuts-A-Lot for is the Logo in the middle for my daughters team. I pieced it together one ball at a time and thank goodness for the 12x24 mat!!! I got the white banner from a sign company for $20 and also used primarily scraps from the sign companies to do everything. Check Craigslist or with your local sign people for their scraps! Their big machines leave a nice little leftover piece for our Cricut Machines!!!

Sunday, June 19, 2011

Cake Projects before Cricut Cake


I have been doing stuff Ive just been too busy to get anything uploaded. Schools our, summers here, deployment started, and Im pooped. Getting re-motivated with lots of ideas. I simply used marshmallow fondant and a 9x13 cake pan and a heart shaped cake pan to make the arm so they looked bent behind the back of the uniform.

Friday, April 8, 2011

And More Cake with the help of CRICUT!!!


Yup you guessed it I used my new favorite FONDANT again! I used the Cricut for my field template which was super easy. There are 3 cakes under there and it measures 15x15. I dirty iced it before I used the fondant to hold it on a bit better. There might be extra people at the party so I made cupcakes just in case! I took pictures of all the players at the last game and they are laminated and tooth-picked to the field. It really didn't take that long to do at all. Enjoy!

My First Yudu


Here is my first Yudu project. It was t-shirts for an Autism walk. I didn't use the emulsion sheets instead I cut it out with my Cricut. It was WAYYYYY easy to do. Can't wait to keep playing with it!!!

Thursday, April 7, 2011

My Cake Adventures


This was a grooms cake that I made last weekend. Only the field is cake the rest is rice krispies. I really in love marshmallow fondant. The Georgia Stadium is not my choice of stadiums but it was for the groom so I guess Ill live with it :)

Saturday, April 2, 2011

Vinyl Car Decals


I get remnant pieces of vinyl from a sign company that they can't use on their big machines to make fun decals for my car. Ill take a picture of my husbands car with all the fun stuff we have made! I use my Cricut and Sure-Cuts-A-Lot to create lots of fun stuff.

Friday, April 1, 2011

Stamped Stone Coasters


We picked up some stone tiles from Home Depot for our coasters. You need to pick tiles that are smooth but not coated. Using Staz On Ink from Stampin Up we stamped the fairy image. Using Stampin Up watercolors we colored in the design and then sealed the entire coater with matte sealer. The tiles are fairly inexpensive and a very easy project! Thanks for stopping by!

Sunday, March 27, 2011

Faux Leather Birthday Card


This was a great technique and WAY easier than it looks. It's always hard to find a masculine birthday card idea since most birthday stuff is pretty girly. To do the Faux Leather you need a piece of fun foam cut to the desired size, your stamp you want, I chose the Stampin Up Motorcycle, and Stampin Up Chocolate Chip Ink Pad. Heat the foam with a embossing gun, get it very hot, you can see the foam melt a little. Once you get it melted you have your stamp inked and ready to go. You must press VERY HARD with the stamp in order to get the impression in the foam. I used the Log Cabin Smooch Spritz and a sponge with basic black on it to distress and emphasize the leather look. I used Stampin Up Very Vanilla Paper, the same distressing tools, and the Backgrounds 1 texture plate for the Sizzix from Stampin up. The card shell is Crumb Cake with a Chocolate Chip Mat. Thanks for checking in!

Monday, March 21, 2011

FREE PAPER LAYOUT!


Time is running out to take advantage of SALE-A-BRATION. This layout is from the Ice Cream Parlor paper set I got FREE when I ordered. I made some cards earlier with it, and now layouts, and next ??? I still have plenty of paper left! The sticky die cuts come with it and coordinate well. I also order enough to get the ribbon and button pack free as well. You can't beat this great deal!!!

Sunday, March 20, 2011

Scrapbook Room Reorganization...IN PROGRESS


So i haven posted much lately for two reasons...1 i couldn't find anything in my room because it was a nightmare of stuff. My family apparently thinks if they can't find where it goes we just put it in my scrapbook room. 2 I didn't have a computer. I've remedied the 2nd problem and am in process for the other. Here's a few pictures of the process with some before and in process shots. Once it's done (if it ever gets 'done') Ill post more pictures!!!!

Saturday, March 19, 2011

Cakes Anyone?


I am beginning to dabble in cakes a bit. Discover fondant the other day and LOVE it!!! I used a marshmallow recipe I found online and I love it. Half a bag of mini marshmallows, 2T Water microwave for 1 minute. Stir in powdered sugar until it wont stir anymore. Awesome!!! Here is a couple cakes I did. Im still learning but one is the Super Mario Mushroom on the mystery box and the other is my weak attempt at the grinch!

Monday, February 21, 2011

Springtime Cards using FREE paper!!!!


Even as a Independent Demonstrator I am taking full advantage of the SALE-A-BRATION! I bought the Easter Blossoms stamp set from the new Occasions Mini along with the 2 3/8 Scallop Punch and I got the Ice Cream Parlor paper kit Free. I LOVE this time of year. I also used the top coat which is pretty cool. It doesn't show in the picture as well but there is a shimmer on the little girl and her basket of eggs. Lots of fun! If you don't have you Occasions Mini or your SALE-A-BRATION Catalina there is still time to order. Email me for your free catalog! I'll keep mastering my photo taking for a better picture.

Sunday, February 13, 2011

Valentine's Sour Cream Containers

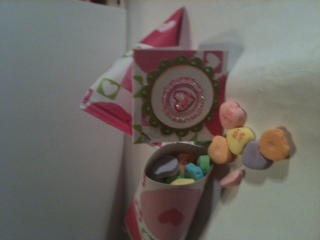
I used Me & My Big Ideas Valentine paper. Cut 5" x4", use double sided adhesive down the 4" side and roll. Put a 2 1/2" strip of double sided adhesive on one end of the tube and seal. Run it through the crimper about 2 clicks. Fill with your treat and repeat the 2 1/2" strip of adhesive on the other end. Run through the crimper 2 clicks making sure not to get your treat caught! The mini cards are made from the 2" strips left of the 12x12 paper. We made 30 containers. The front of the mini card are made with the 1 3/4" scallop circle and 1 3/8 circle punches from Stampin' Up. My 8 year old had a blast making them. See what happens when I clean my scrapbook room?!?! heres a link for the photos I'm having some technical difficulties. It will also pass by on my creative slideshow at the bottom of my blog.

Daily Crafting Challenges Anyone?!?!?!

Now that I'm feeling better I am going to spend more time doing what I love... Crafting. I think the best way to truly do this is to do something everyday. They say if you do something everyday for 30 days you create a habit. So I am changing my obsession to a well-developed habit. My first challenge is to make my room user friendly. It has become the dumping ground for everything my husband doesn't want to find the real home for. This epidemic begins today...well when I wake up at a normal hour not 2:45 in the morning. So today's official challenge is to pick everything up in my room and find it's home so I can put my wonderful creativity to work...Good Luck!!! Tell me what did you do today?

Thursday, February 3, 2011

Girl Scout Peace


We always make t-shirts for every event we do with my girl scout troop. I used Sure-Cuts-A-Lot and my Cricut Expression to make the peace sign and the troop sign. I used clear shelf paper to cut out of because its a lot cheaper than vinyl. I used the spray cannon to spray the shirts with pink and neon green. When I removed the stencil the peace sign didnt pop enough. I used fabric markers to outline the stencils. I did 10 shirts in about an hour.

Thursday, January 13, 2011

Lot's Of New Stuff

So many new promotions so little time!!! Check out all the goodies!!! Book a party during Sale-A-Bration and get extra free stuff!